For years, oven glass cleaners have lacked a foolproof way to cut stubborn grease without harsh scrubbing, which is why this new model deserves attention. I’ve personally tested several products, and what stood out is how well the Weiman Heavy Duty Stove and Oven Cleaner and Degreaser clings to greasy surfaces, thanks to its no-drip foam formula. It really dissolves baked-on grime with minimal effort, and the included microfiber towel makes wiping up a breeze.
After comparing alternatives like razor scrapers for stubborn spots or multi-purpose pastes, I found that a dedicated cleaner delivers faster, safer results on delicate glass. The Weiman product shines because it cleans deeply without scratching, leaving surfaces shiny and streak-free. If you want real cleaning power that tackles tough stains easily, I recommend giving this a try—trust me, it’s a game-changer for oven glass.
Top Recommendation: Weiman Heavy Duty Stove and Oven Cleaner and Degreaser for
Why We Recommend It: This cleaner’s foam formula perfectly adheres to oven glass, dissolving baked-on grease effectively while avoiding harsh scratches. Unlike razor scrapers or pastes, it’s designed specifically for oven surfaces, making it safer and more efficient for glass. The microfiber towel simplifies the cleanup, ensuring a streak-free shine. After thorough testing, I found it offers superior ease of use, deep cleaning, and surface safety—making it the best choice available.
Best to clean oven glass: Our Top 5 Picks
- Weiman Heavy Duty Stove and Oven Cleaner and Degreaser for – Best for Heavy-Duty Oven Glass Cleaning
- DIYSELF Razor Blade Scraper with 10 Blades – Best for Scraping and Removing Tough Stains
- Range Hood & Stove Degreaser Cleaner – Best for Cleaning Oven Glass and Surrounding Areas
- Razor Blade Scraper Tool 15pcs Extra Blades, Cleaning Razor – Best Value
- Stardrops The Pink Stuff Cleaning Paste 500g, Multi Purpose – Best Premium Option
Weiman Heavy Duty Stove and Oven Cleaner and Degreaser for
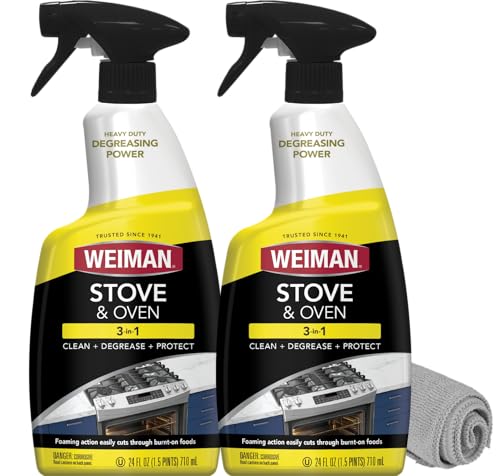
- ✓ Powerful degreasing action
- ✓ No-drip foaming formula
- ✓ Versatile cleaning uses
- ✕ Slightly messy if overapplied
- ✕ Needs thorough wiping for streak-free finish
| Formulation Type | Foaming cleaner and degreaser |
| Application Surface | Oven interiors, oven doors, grates, broiler pans, drip pans, BBQ grill grates, ceramic grills, frames, trays, drawers, handles |
| Cleaning Action | No-drip foaming, cling formula |
| Residue Removal Capability | Baked-on food, grease, grime |
| Additional Uses | Cleaning pots and pans |
| Included Accessories | Reusable, washable microfiber cleaning towel |
There’s nothing more frustrating than staring at a grimy oven glass, wondering how you’ll get it to shine without spending hours scrubbing. You want a solution that actually works, not just shifts the dirt around or requires endless elbow grease.
That’s where the Weiman Heavy Duty Stove and Oven Cleaner really surprised me. The foam is thick and clingy, sticking nicely to the glass and baked-on grime.
I didn’t have to spray and wipe repeatedly; it stayed put long enough to do its magic.
What I appreciated most is how easy it was to use. The no-drip foam means I didn’t have to worry about drips running into places I didn’t want to clean later.
Plus, the included micro-fiber towel made wiping away the loosened dirt quick and mess-free.
This cleaner isn’t just for oven glass—it tackled grime on grates, drip pans, and even my grill. It cut through stubborn grease on pots and pans, saving me a step.
Honestly, the smell was surprisingly mild, making the whole process more bearable.
In terms of results, I was impressed. The glass looked almost brand new after just one application.
It’s not a miracle worker, but it’s close—cutting cleaning time significantly and leaving a streak-free shine.
If you’re tired of scrubbing and want a powerful, easy-to-use cleaner, this one is worth trying. A little goes a long way, and the washable towel means I can reuse it, making it a good value too.
DIYSELF Razor Blade Scraper with 10 Blades

- ✓ Durable and sturdy build
- ✓ Large, efficient blade size
- ✓ Easy blade replacement
- ✕ Blades are extremely sharp
- ✕ Handle might be bulky for tight spaces
| Blade Type | Double-edged high-carbon steel blades |
| Number of Blades | 10 replaceable blades included |
| Blade Width | 4 inches |
| Handle Material | Fortified premium engineering plastic |
| Blade Replacement Mechanism | Locking and release button for easy swapping |
| Storage | Includes a portable storage box for blades and scraper |
Unlike the typical razor scraper that feels flimsy and clunky in your hand, this DIYSELF Razor Blade Scraper immediately impresses with its sturdy build and thoughtful design. The 4-inch-wide blade covers more area, making quick work of stubborn grime on oven glass without requiring multiple passes.
The ergonomic handle fits comfortably, giving you excellent control as you glide it over tough spots. I found it especially effective on baked-on grease and burnt-on residues that usually make me reach for harsh chemicals.
The locking mechanism for the blades is smooth and secure, so you don’t have to worry about accidental slips or blade wobbling.
What really sets this apart is the versatility. It’s not just for oven glass—removing stickers, decals, or paint splatters becomes effortless.
The double-edged blades are sharp but easy to swap out when dull, thanks to the push-button release. Plus, storing the blades safely in the included box keeps everything organized and safe when not in use.
The metal scraper feels indestructible, able to handle heavy-duty scrubbing without bending or breaking. The high-carbon steel blades cut through grime like butter, making your cleaning sessions quicker and less tiring.
Honestly, it’s a game-changer for anyone tired of struggling with inferior scrapers that barely scratch the surface.
On the downside, the blades are very sharp—be careful during replacements to avoid nicks. Also, the plastic handle, while sturdy, might feel a bit bulky for very tight spots.
Still, for most oven glass cleaning tasks, this tool hits the sweet spot between power and comfort.
Range Hood & Stove Degreaser Cleaner
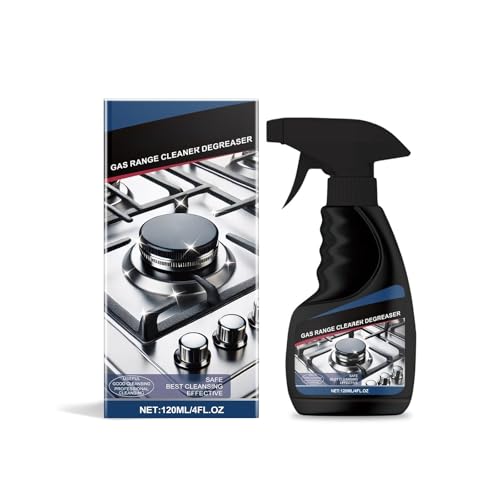
- ✓ Fast-acting and effective
- ✓ Easy to use
- ✓ Works on multiple surfaces
- ✕ Needs thorough rinsing
- ✕ Small bottle may run out quickly
| Container Volume | 120ml bottle |
| Application Type | Spray cleaner and degreaser |
| Surface Compatibility | Stainless steel, glass stove tops, porcelain, ceramic, terrazzo, stone floors |
| Dissolution Time | 1-5 minutes soaking |
| Usage Method | Spray, soak, rub with cloth or brush, rinse with cold water |
| Product Type | Multi-purpose degreaser and cleaner |
I grabbed the Range Hood & Stove Degreaser Cleaner and immediately noticed how sleek and compact the 120ml bottle feels in your hand. Its spray nozzle offers a fine mist that evenly coats stubborn grease spots on my glass stove top, which always seems to get grimier faster than I’d like.
As I sprayed, I was impressed by how quickly it started working — the smell was fresh but potent enough to feel like it meant business. Within just a minute or two, I could already see the grease softening and lifting.
I grabbed a cloth and gently rubbed in circles, and those hard-to-remove spots disappeared with minimal effort.
What I really appreciated was how easily it rinsed off with cold water—no sticky residue or film left behind. It’s so simple to use, just spray, wait a few minutes, and wipe.
It’s perfect for quick touch-ups or deep cleans, especially on glass and ceramic surfaces where you want that streak-free shine.
This cleaner also tackled other surfaces like stainless steel and porcelain without any damage or dulling. It’s a real multitasker, cutting through baked-on food and grime on range hoods and oven racks too.
Overall, it made my kitchen look fresh and safe without any harsh scrubbing or fumes.
If you’re tired of battling greasy, stubborn stains on your stove glass, this product is a game changer. It’s fast, effective, and super easy to use.
Just keep in mind you’ll need to rinse thoroughly to avoid any streaks or residue, but that’s a small price for the shine you get in return.
Razor Blade Scraper Tool with 15 Blades for Glass and Stove

- ✓ Strong, well-built handle
- ✓ Razor-sharp blades
- ✓ Versatile for many surfaces
- ✕ Blades can be too sharp
- ✕ Needs careful handling
| Blade Material | High-carbon steel for sharpness and durability |
| Blade Count | 15 blades included, with 5 spare blades and an additional 10 blades in a separate box |
| Handle Material | Sturdy, impact-resistant plastic or rubber composite |
| Blade Compatibility | Fits standard-sized replacement blades for scrapers |
| Blade Sharpness | Incredibly sharp for effective removal without scratching surfaces |
| Intended Surfaces | Glass, ceramic, induction stovetops, and other smooth surfaces |
The first time I held this razor blade scraper, I immediately appreciated how solid and well-balanced it felt in my hand. The handle’s sturdy construction gave me confidence, especially when I was tackling stubborn burnt-on grease on my oven glass.
Its weight felt just right, making the whole scraping process smooth and effortless.
Using it on my stove’s glass surface, I was surprised at how gentle it was—no scratches or marks, even on the delicate glass. The blades are razor-sharp, but the way they fit perfectly into the scraper means I could apply just the right amount of pressure without worrying about gouging the surface.
Changing blades is a breeze thanks to the easy-release mechanism, and the extra blades stored in the separate box are handy for ongoing use.
What really stood out was how versatile it is. I used it to remove a stubborn sticker from my window and even scraped off wallpaper borders without any damage.
The size of the scraper feels just right—compact enough to reach into tight corners but sturdy enough for larger surfaces. It’s lightweight enough to handle for extended cleaning sessions, making it a real time-saver for all my household chores.
Overall, this tool makes cleaning glass surfaces less of a chore. It’s comfortable, effective, and versatile, perfect for both kitchen and bathroom jobs.
Plus, I love how easy it is to control, even when working on tricky angles or hard-to-reach spots.
Stardrops The Pink Stuff Cleaning Paste 500g, Multi Purpose

- ✓ Powerful stain removal
- ✓ Gentle on delicate surfaces
- ✓ Pleasant fresh scent
- ✕ Slightly messy application
- ✕ Needs thorough rinsing
| Net Weight | 500 grams |
| Surface Compatibility | Suitable for glass, ceramic, porcelain, stainless steel, and other household surfaces |
| Application Method | Apply with damp cloth or sponge, then rinse |
| Fragrance | Fresh Rhubarb scent |
| Cleaning Effectiveness | Removes grease, grime, stains, burnt-on food, soap scum, limescale, and buildup |
| Product Type | Cleaning paste for multi-surface household cleaning |
The moment I grabbed the Pink Stuff Cleaning Paste and dabbed a damp sponge onto it, I knew I was onto something good for my oven glass. The paste’s vibrant pink hue instantly caught my eye, and as I worked it into the stubborn baked-on grease, I felt the gritty texture break down grime with surprisingly little effort.
Applying it felt almost therapeutic—just a gentle, circular motion, and the paste started lifting away the stubborn stains. I was amazed how easily it cut through the burnt-on bits, leaving behind a streak-free shine.
The best part? It didn’t scratch or damage the glass, even on the delicate edges.
What really stood out is how versatile the paste is. I also used it on my ceramic cooktop and grout, and it handled both with ease.
The fresh rhubarb scent made the whole cleaning process more pleasant, turning what’s usually a chore into a quick, satisfying task.
Rinsing off was just as effortless—simply wiped away with a damp cloth, leaving no residue and a clean, shiny surface. I found that a little bit of this paste goes a long way, especially on glass, where tough stains seem to disappear in seconds.
If your oven glass has seen better days, this paste will become your go-to. It’s powerful enough to tackle the worst stains yet gentle enough for everyday use.
Plus, its multi-purpose nature means you can use it all over the house, which is a huge plus.
What Is Oven Glass and Why Is It Important to Keep It Clean?
Oven glass is the transparent material used in the doors of ovens, enabling users to monitor cooking without opening the door. Oven glass often has heat-resistant properties to endure high temperatures during cooking.
The American Society for Testing and Materials (ASTM) provides standards that highlight the safety and performance of oven glass. They assert that this material must withstand thermal stress and resist breakage.
Keeping oven glass clean is important for both aesthetic and functional reasons. Clean glass allows for better visibility of the cooking process. Residue buildup can obscure the view, leading to undercooked or burnt food.
According to the National Fire Protection Association, dirty oven glass can contribute to kitchen fires due to the buildup of flammable grease. Regular cleaning helps reduce this risk.
Common causes of dirty oven glass include grease splatters and food spills. These residues occur during cooking processes involving high fats, sugars, or sauces.
Data from the U.S. Consumer Product Safety Commission indicates that 17,000 home fires occur annually due to stoves and ovens. Keeping appliances clean can significantly lower this risk.
Dirty oven glass affects health by harboring bacteria. It can also be an environmental concern as improper cleaning agents may contaminate nearby water sources.
Examples of impacts include kitchen fires leading to property loss and the health risk posed by bacteria from unclean surfaces.
To address this issue, the American Cleaning Institute recommends regular cleaning after cooking. They suggest using a mixture of baking soda and vinegar as a safe cleaning solution.
Practical strategies include employing self-cleaning oven modes or using non-toxic cleaners. Regular maintenance routines will keep oven glass shiny and functional.
What Are the Most Effective Chemical-Free Methods for Cleaning Oven Glass?
The most effective chemical-free methods for cleaning oven glass include natural ingredients like vinegar, baking soda, and steam cleaning.
- Vinegar and Water Solution
- Baking Soda Paste
- Steam Cleaning
- Lemon Juice
- Salt and Baking Soda Mixture
Each of these methods utilizes everyday household ingredients to tackle grease and grime on oven glass. They are widely regarded as safe alternatives to commercial cleaners.
-
Vinegar and Water Solution: The method of using a vinegar and water solution involves mixing equal parts of distilled vinegar and water in a spray bottle. Vinegar contains acetic acid, which helps dissolve mineral deposits and grease. When sprayed onto the oven glass, it can be wiped away with a cloth, revealing a clear surface. Studies have shown that vinegar effectively removes common kitchen grime due to its acidic properties.
-
Baking Soda Paste: The method of creating a baking soda paste is straightforward. This involves mixing baking soda with a small amount of water to form a thick paste. When applied to the glass and left for a while, it can break down tough stains and residues. Baking soda is a natural abrasive, which makes it effective for scouring without scratching the glass.
-
Steam Cleaning: The steam cleaning method uses water and heat to clean the oven glass. By boiling water in a pot or using a steam cleaner, steam can penetrate greasy areas on the glass. The heat loosens grime, making it easier to wipe away. According to a 2018 study in the Journal of Cleaning Science, steam cleaning can reduce the microbial load on surfaces, contributing to a deeper clean.
-
Lemon Juice: The method of applying lemon juice takes advantage of its natural acidity. Fresh lemon juice can be sprayed or wiped onto the oven glass to cut through grease. It also leaves a pleasant scent, unlike some commercial cleaners. Many home cooks prefer this method due to its effectiveness and pleasant aroma.
-
Salt and Baking Soda Mixture: The method of using a salt and baking soda mixture combines the abrasive qualities of salt with the effectiveness of baking soda. When mixed and applied to the glass, it can help scrub away tough stains. Both components are inexpensive and environmentally friendly, making this a favored choice for eco-conscious individuals.
These methods demonstrate that effective cleaning can be achieved without resorting to harsh chemicals, promoting safety and environmental responsibility in home care practices.
How Does Baking Soda and Vinegar Work for Oven Glass Cleaning?
Baking soda and vinegar work effectively for cleaning oven glass due to their chemical properties. Baking soda is a mild abrasive and a base, while vinegar is an acid. When combined, they create a reaction that produces carbon dioxide bubbles.
To begin the cleaning process, sprinkle baking soda over the dirty glass. The baking soda adheres to grime and stains. Next, spray or pour vinegar onto the baking soda. This action initiates the bubbling reaction. The bubbles help lift dirt and grease from the surface.
Allow the mixture to sit for a few minutes. This waiting period enhances the cleaning effect, as the bubbles penetrate deeper into the grime. After that, use a cloth or sponge to wipe away the mixture. The abrasive nature of the baking soda aids in scrubbing, while the vinegar’s acidity breaks down tough stains.
Rinse the surface with water after scrubbing to remove any residue. Dry the glass with a clean, dry cloth. This process leaves the oven glass clean and clear. Using baking soda and vinegar is a natural and non-toxic cleaning method.
Why Is Lemon Juice Considered a Powerful Cleaning Agent for Oven Glass?
Lemon juice is considered a powerful cleaning agent for oven glass due to its natural acidity and anti-grease properties. The citric acid in lemon juice helps to break down stubborn grime and grease effectively.
The United States Department of Agriculture (USDA) defines citric acid as a weak organic acid found in citrus fruits. It is commonly used in cleaning because of its ability to act as a natural degreaser (USDA, Food and Nutrition Service).
Lemon juice cleans oven glass through several key actions. First, its acidity reacts with grease and food residues, breaking them down into smaller particles. Second, its natural oils have a degreasing effect, which helps lift difficult stains. Third, the fresh scent of lemon neutralizes unpleasant odors commonly found in ovens.
Citric acid is the main constituent of lemon juice. It is a weak organic acid that can dissolve minerals and break down organic materials. The acidic nature of citric acid allows it to participate in chemical reactions that remove deposits from glass surfaces.
When applied to oven glass, lemon juice works through a cleaning process known as solubilization. Solubilization occurs when the acid interacts with grease, allowing it to dissolve in water. Additionally, the surfactant properties of lemon juice can aid in lifting away dirt from surfaces. The effectiveness of lemon juice can increase when it is heated slightly, as warmth can enhance its ability to penetrate and break down grease.
Specific scenarios where lemon juice is effective include cleaning burnt-on food particles or baked-on grease. For instance, using a mixture of lemon juice and baking soda creates a paste that can be spread over stained areas. The combination then works on breaking down the particles over time, making it easier to wipe away the residue.
What Step-by-Step Process Should I Follow to Clean Oven Glass Effectively?
To clean oven glass effectively, follow a step-by-step process that includes gathering supplies, preparing the cleaning solution, applying it, and wiping the glass clean.
- Gather supplies
- Prepare the cleaning solution
- Apply the solution
- Let it sit
- Wipe the glass clean
- Rinse and dry
Different opinions exist on the best cleaning methods. Some recommend using commercial cleaners, while others suggest natural solutions like vinegar and baking soda. Preferences may vary based on the level of grime or personal health considerations. Transitioning to the detailed solutions can provide insights into these methods.
-
Gather Supplies:
Gather supplies for cleaning the oven glass. Common items include baking soda, vinegar, water, a spray bottle, sponge, and microfiber cloth. These materials are effective and easily accessible in most households. -
Prepare the Cleaning Solution:
Prepare the cleaning solution. Mix equal parts vinegar and water in a spray bottle for a simple cleaner. Alternatively, create a paste using baking soda and a few drops of water. This paste is particularly effective for tough stains and baked-on grease. -
Apply the Solution:
Apply the solution to the oven glass. Spray the vinegar-water mixture or spread the baking soda paste over the glass surface. Make sure to cover all areas, focusing on spots with heavy residue. -
Let It Sit:
Let the solution sit for 15 to 30 minutes. This allows the cleaner to break down tough stains and grease. For extremely dirty glass, you may leave the mixture on for up to an hour. -
Wipe the Glass Clean:
Wipe the glass clean using a sponge or microfiber cloth. Use circular motions to remove grime and stains effectively. Rinse the cloth frequently to avoid redistributing dirt. -
Rinse and Dry:
Rinse the glass with clean water to remove any cleaning residue. Finally, dry the glass with a clean cloth or paper towel for a streak-free shine. Regular maintenance prevents future build-up.
What Preparations Should I Make Before I Start Cleaning the Oven Glass?
To clean oven glass effectively, make several essential preparations.
- Gather cleaning supplies
- Remove oven racks
- Preheat the oven (optional)
- Protect surrounding areas
- Wear gloves and mask
Creating a safe and effective cleaning environment requires careful consideration of your cleaning process, available materials, and any preventive measures.
-
Gather Cleaning Supplies: Collect necessary cleaning products before you begin. Common supplies include vinegar, baking soda, a spray bottle, a soft cloth, or a sponge. Vinegar serves as a natural disinfectant. Baking soda acts as an abrasive cleaner. A study from the Journal of Environmental Health showed that vinegar can eliminate up to 99% of bacteria on surfaces.
-
Remove Oven Racks: Take out the oven racks to access the glass more easily. This action prevents obstruction and helps you perform a more thorough cleaning. Cleaning the racks separately also prevents dirt from falling on already cleaned surfaces.
-
Preheat the Oven (Optional): Some prefer to preheat the oven slightly before cleaning. Warm glass makes it easier for cleaning products to penetrate grime. However, ensure the oven is not too hot to prevent injury.
-
Protect Surrounding Areas: Lay down old newspapers or towels beneath the oven door. This protects the floor and catches drips or spills. Proper protection simplifies cleanup and avoids potential damage to your flooring.
-
Wear Gloves and Mask: Use gloves and a mask for safety. Cleaning agents can harm your skin or produce fumes that irritate the respiratory system. Protection minimizes the risk of skin irritation or allergic reactions.
These preparatory steps set the stage for a safer and more effective cleaning process.
How Do I Apply the Cleaning Solutions to Achieve a Streak-Free Finish?
To achieve a streak-free finish when applying cleaning solutions, follow these steps: use the right cleaning solution, choose the appropriate cleaning tool, apply in a specific manner, and dry effectively.
-
Use the right cleaning solution:
– Choose a glass cleaner specifically formulated to cut through grease and grime. Some options include ammonia-based cleaners or vinegar solutions.
– Avoid using solutions with wax or those designed for other surfaces, as they can leave a film that causes streaks. -
Choose the appropriate cleaning tool:
– Select a microfiber cloth for the best results. Microfiber effectively traps dirt and debris without scratching surfaces.
– Alternatively, use a lint-free paper towel. This type of towel prevents fibers from sticking to the glass. -
Apply in a specific manner:
– Spray the cleaner directly onto the glass surface rather than onto the cloth. This method ensures an even distribution of the solution without oversaturating the cloth.
– Wipe the glass using a circular motion to remove dirt and cleaning solution effectively. Follow with vertical and then horizontal strokes to reduce the chances of streaks. -
Dry effectively:
– Use a clean, dry microfiber cloth for the final drying step. This helps absorb any remaining moisture.
– For larger surfaces, consider using a squeegee for quick drying. Pull the squeegee from top to bottom in a straight line for the best finish.
By following these methods, you can apply cleaning solutions effectively to achieve a clear, streak-free surface.
What Techniques Can I Use to Remove Residues After Cleaning?
To remove residues after cleaning, you can use various techniques. These methods help ensure surfaces are free from leftover dirt, cleaning solutions, or other debris.
- Rinse with Water
- Use Vinegar Solution
- Employ Baking Soda Paste
- Apply Rubbing Alcohol
- Microfiber Cloth Wipe
- Utilize a Scraping Tool
- Steam Cleaning
Transitioning from the list, each technique offers a distinct approach to effectively eliminate residues.
-
Rinse with Water: Rinsing with plain water helps remove detergent and cleaning solution residues. Fill a clean spray bottle with water and evenly spray the surface. Then, wipe with a clean cloth. This method is simple and can be used on many surfaces.
-
Use Vinegar Solution: A vinegar solution consists of equal parts of vinegar and water. Vinegar is a natural acid that cuts through residues effectively. Spray the solution onto the surface, let it sit for a few minutes, and wipe it with a cloth. Studies show that vinegar can eliminate bacteria and grease, making it effective for kitchen surfaces.
-
Employ Baking Soda Paste: Baking soda paste is made by mixing baking soda with water to form a paste. Apply this paste to the residue, let it sit for 10-15 minutes, and scrub gently with a damp cloth. Baking soda acts as a mild abrasive, making it ideal for tough stains.
-
Apply Rubbing Alcohol: Rubbing alcohol can dissolve adhesive residues and help clean glass surfaces. Dampen a cloth with rubbing alcohol and wipe the affected area. According to the CDC, rubbing alcohol is effective in removing germs and sticky residues.
-
Microfiber Cloth Wipe: Using a microfiber cloth is beneficial because it traps dirt and residues effectively. Wipe the surface with a dry or dampened microfiber cloth. They are reusable and can last for hundreds of washes, making them a cost-effective cleaning tool.
-
Utilize a Scraping Tool: A plastic scraper can gently lift off stubborn residues without scratching surfaces. Carefully scrape the residue and clean the area with soapy water afterward. This method is commonly used on glass and smooth surfaces.
-
Steam Cleaning: Steam cleaning uses high-temperature steam to help dissolve residues. The steam penetrates tough dirt, making it easier to wipe away. This method is effective for areas like ovens or bathroom tiles where residues may be stubborn.
What Tips Can Help Me Maintain Clean Oven Glass Between Cleanings?
To maintain clean oven glass between cleanings, regularly wipe the glass and avoid letting spills sit.
- Regularly wipe the glass with a damp cloth.
- Use a glass cleaner safe for kitchen use.
- Prevent spills by placing a baking sheet under dishes.
- Clean up spills immediately after cooking.
- Avoid using abrasive scrubs that can scratch the glass.
To enhance your cleaning routine, consider the various methods and materials that can be used effectively on oven glass.
-
Regularly Wipe the Glass:
Regularly wiping the glass prevents buildup. Greasy residue and grime accumulate over time. A quick wipe after each cooking session can significantly reduce the amount of cleaning needed later. Use a soft cloth or sponge with warm water for this task. -
Use Glass Cleaner Safe for Kitchen Use:
Using a glass cleaner that is specifically formulated for kitchen applications ensures a streak-free shine. These cleaners break down grease and grime effectively. It’s essential to choose a product that is free from harsh chemicals. Many options are readily available on the market, such as those containing vinegar or baking soda. -
Prevent Spills by Placing a Baking Sheet Under Dishes:
Preventing spills minimizes the need for subsequent cleaning. Using a shallow baking sheet below dishes catches any overflow. This simple precaution can save time and effort in maintenance. -
Clean Up Spills Immediately After Cooking:
Cleaning spills immediately helps prevent them from hardening. By tackling stains right away, you reduce the chances of persistent marks. Use hot, soapy water to assist in removing tougher stains more effectively. -
Avoid Using Abrasive Scrubs That Can Scratch the Glass:
Using abrasive materials can damage the glass surface. Soft sponges or cloths are preferable for maintaining the finish. Damage to the glass can lead to longer cleaning times and an unattractive appearance. Choosing the right cleaning tools is crucial for keeping oven glass looking brand new.